Change My Clothes: Difference between revisions
>Junipea m →Trivia |
>Junipea revamped |
||
| Line 1: | Line 1: | ||
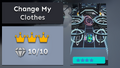
'''Change My Clothes''' is level 1 in "[[Junipea's Collection|Rolling Sky - Junipea's Collection]]" made by [[junipea]]. | '''Change My Clothes''' is level 1 in "[[Junipea's Collection|Rolling Sky - Junipea's Collection]]" made by [[junipea]]. | ||
{{Infobox RSLevel|creator=junipea|crowns=3|gems=10|levelname=Change My Clothes|name=Change My Clothes|passingdifficulty=4.8|perfectdifficulty=5. | {{Infobox RSLevel|creator=junipea|crowns=3|gems=10|levelname=Change My Clothes|name=Change My Clothes|passingdifficulty=4.8|perfectdifficulty=5.2|releasedate=August 29, 2021|image=IMG 5624.jpg}} | ||
== Level Features == | == Level Features == | ||
| Line 18: | Line 18: | ||
# Lonely Night | # Lonely Night | ||
# Alone with Me II | # Alone with Me II | ||
# | # You are not Alone (Noir) | ||
== Gem Locations == | == Gem Locations == | ||
This level features 10 gems to be collected. Here is a guide on how to collect these gems. | This level features 10 gems to be collected. Here is a guide on how to collect these gems. | ||
# At 4%, there is a floating gem. A light swipe to the | # At 4%, there is a floating gem. A light swipe to the middle. | ||
# At 6%, there is a ground gem. Avoid the flying powerup and use the jump pads on the sides. | # At 6%, there is a ground gem. Avoid the flying powerup and use the jump pads on the sides. | ||
# At 11%, there is a floating gem. While jumping with the powerup, go around the springing cube. | # At 11%, there is a floating gem. While jumping with the powerup, go around the springing cube. | ||
# At 16%, there is a jump pad gem. Go to the right side and jump around the | # At 16%, there is a jump pad gem. Go to the right side and jump around the double pyramids. | ||
# At 27%, there is a | # At 27%, there is a ground gem. Go towards the middle. | ||
# At 33%, there is a floating gem. (automatic) | # At 33%, there is a floating gem. (automatic) | ||
# At | # At 39%, there is a glass gem. Stay in the middle and go towards the movers. | ||
# At | # At 49%, there is a ground gem. Swipe towards the side jump pad, and jump around the falling circles. | ||
# At | # At 53%, there is a floating gem. Swipe to the sides and back to the middle. | ||
# At | # At 56%, there is a ground gem. Go to the sides, avoiding the jump pads and back to the middle. | ||
== Crown Locations == | == Crown Locations == | ||
This level features 3 crowns to be collected. Here is a guide on how to collect these crowns. | This level features 3 crowns to be collected. Here is a guide on how to collect these crowns. | ||
# At | # At 40%, there is a ground crown. ''Quickly swipe towards the crown and to any side.'' | ||
# At 65%, there is a ground crown. ''Swipe to the sides where the movers are and then quickly swipe towards the middle to get the second crown. This one can be tricky and you may lose a shield or not get it but still succeed in the action.'' | # At 65%, there is a ground crown. ''Swipe to the sides where the movers are and then quickly swipe towards the middle to get the second crown. This one can be tricky and you may lose a shield or not get it but still succeed in the action.'' | ||
# At | # At 92%, there is a ground crown. ''Starting at 90%, pick up the jump boost, go all the way to the middle and slowly jump around the falling circles.'' | ||
== Trivia == | == Trivia == | ||
| Line 50: | Line 50: | ||
*An update was given to the level in the 1.1.0 update, which cleaned up the level a bit, fixed some issues, and gave it a proper title and cover. | *An update was given to the level in the 1.1.0 update, which cleaned up the level a bit, fixed some issues, and gave it a proper title and cover. | ||
*There were some bugs in previous versions of the collection, however in update 1.1.2, all of these bugs were addressed. | *There were some bugs in previous versions of the collection, however in update 1.1.2, all of these bugs were addressed. | ||
*The level was completely revamped in update 1.1.5. | |||
== Gallery == | == Gallery == | ||
<gallery> | <gallery> | ||
File:Rs edit.png|Thumbnail of the original video | File:Rs edit.png|Thumbnail of the original video | ||
File:Change my clothes.png|Thumbnail of the revamped version. | |||
</gallery>{{Navbox|above=Rolling Sky Edits|group1=[[Category:Rolling Sky Edits]]|list3=<!-- ... -->|listclass=hlist|name=Testing area|state={{{state|}}}|title=Rolling Lounge|list1=[[Change My Clothes]] - [[Elektronomia & RUD - Rollercoaster]] - [[Lavender Breeze]] - [[Lost]] - [[Maze]] - [[Prismo - Weakness]]}} | </gallery>{{Navbox|above=Rolling Sky Edits|group1=[[Category:Rolling Sky Edits]]|list3=<!-- ... -->|listclass=hlist|name=Testing area|state={{{state|}}}|title=Rolling Lounge|list1=[[Change My Clothes]] - [[Elektronomia & RUD - Rollercoaster]] - [[Lavender Breeze]] - [[Lost]] - [[Maze]] - [[Prismo - Weakness]]}} | ||
[[Category:Rolling Sky Edits]] | [[Category:Rolling Sky Edits]] | ||
Revision as of 14:19, 4 August 2022
Change My Clothes is level 1 in "Rolling Sky - Junipea's Collection" made by junipea. Template:Infobox RSLevel
Level Features
The level uses themes of Alone and Alone Remix. It features references to Microchip (as seen at 70%-72%) and to Alone II (as seen at 0% and 16%-17%).
Soundtrack
This level uses the soundtrack Dream & Alec Benjamin - Change My Clothes. The track can be listened here.
Themes
This level features no special themes.
- Lonely Night
- Alone with Me
- You are not Alone
- Alone with Me
- You are not Alone
- Lonely Night
- Alone with Me II
- You are not Alone (Noir)
Gem Locations
This level features 10 gems to be collected. Here is a guide on how to collect these gems.
- At 4%, there is a floating gem. A light swipe to the middle.
- At 6%, there is a ground gem. Avoid the flying powerup and use the jump pads on the sides.
- At 11%, there is a floating gem. While jumping with the powerup, go around the springing cube.
- At 16%, there is a jump pad gem. Go to the right side and jump around the double pyramids.
- At 27%, there is a ground gem. Go towards the middle.
- At 33%, there is a floating gem. (automatic)
- At 39%, there is a glass gem. Stay in the middle and go towards the movers.
- At 49%, there is a ground gem. Swipe towards the side jump pad, and jump around the falling circles.
- At 53%, there is a floating gem. Swipe to the sides and back to the middle.
- At 56%, there is a ground gem. Go to the sides, avoiding the jump pads and back to the middle.
Crown Locations
This level features 3 crowns to be collected. Here is a guide on how to collect these crowns.
- At 40%, there is a ground crown. Quickly swipe towards the crown and to any side.
- At 65%, there is a ground crown. Swipe to the sides where the movers are and then quickly swipe towards the middle to get the second crown. This one can be tricky and you may lose a shield or not get it but still succeed in the action.
- At 92%, there is a ground crown. Starting at 90%, pick up the jump boost, go all the way to the middle and slowly jump around the falling circles.
Trivia
- This level was junipea's first Rolling Sky Edit.
- This level's main theme is supposed to be You are not Alone.
- This level could have been a completely different level (but with the same themes), with the song "Play" by Alan Walker, however Junipea decided to use this song instead.
- This level in the game is placed between "Kung Fu" and "Faded", but in the collection's level list, is placed between "Running Out of Roses" and "Sweet Dreams".
- This is the only level which download link was publicly available (at launch).
- An update was given to the level in the 1.1.0 update, which cleaned up the level a bit, fixed some issues, and gave it a proper title and cover.
- There were some bugs in previous versions of the collection, however in update 1.1.2, all of these bugs were addressed.
- The level was completely revamped in update 1.1.5.
Gallery
-
 Thumbnail of the original video
 -
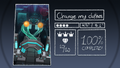 Thumbnail of the revamped version.

